Deploying a Machine Learning Project to AWS - Part 1
Recently, I figured out how to deploy a machine learning project written in Python to an Amazon Web Service (AWS) EC2 instance. A member of the Real Python community asked if I had created a tutorial on this. I thought it would be a great idea since this is something that students in a statistics or machine learning class may have never done before. I have received so much help from the Real Python community, Youtube channelsm, and and online tutorials that I want to give back and share my knowledge.
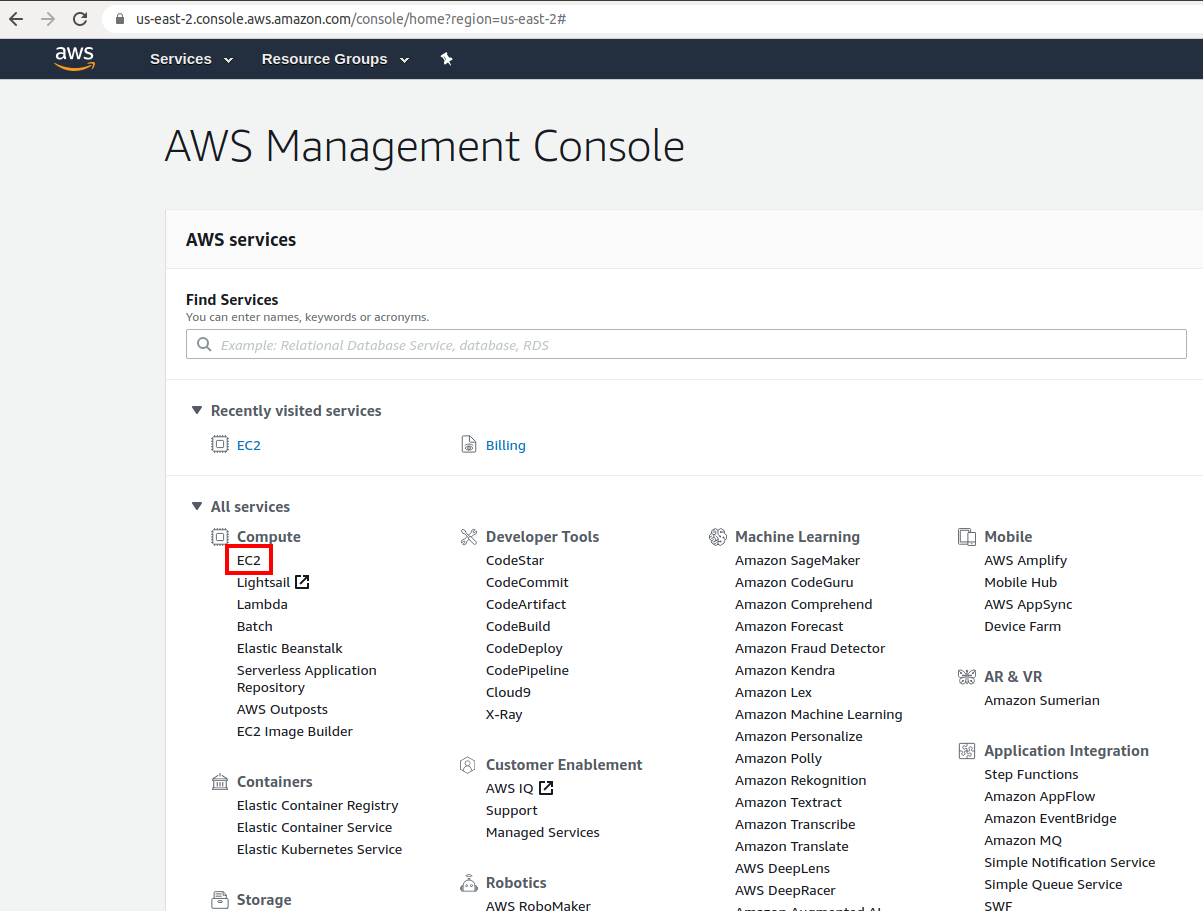
I’m going to assume that readers of this tutorial have already created an AWS account. When we login to AWS, the first thing we see is the AWS management console. AWS provides many different services, but to keep things simple, we will only use the EC2 service. For this tutorial, we will set up an EC2 instance that runs an Ubuntu Server 18.04 LTS.
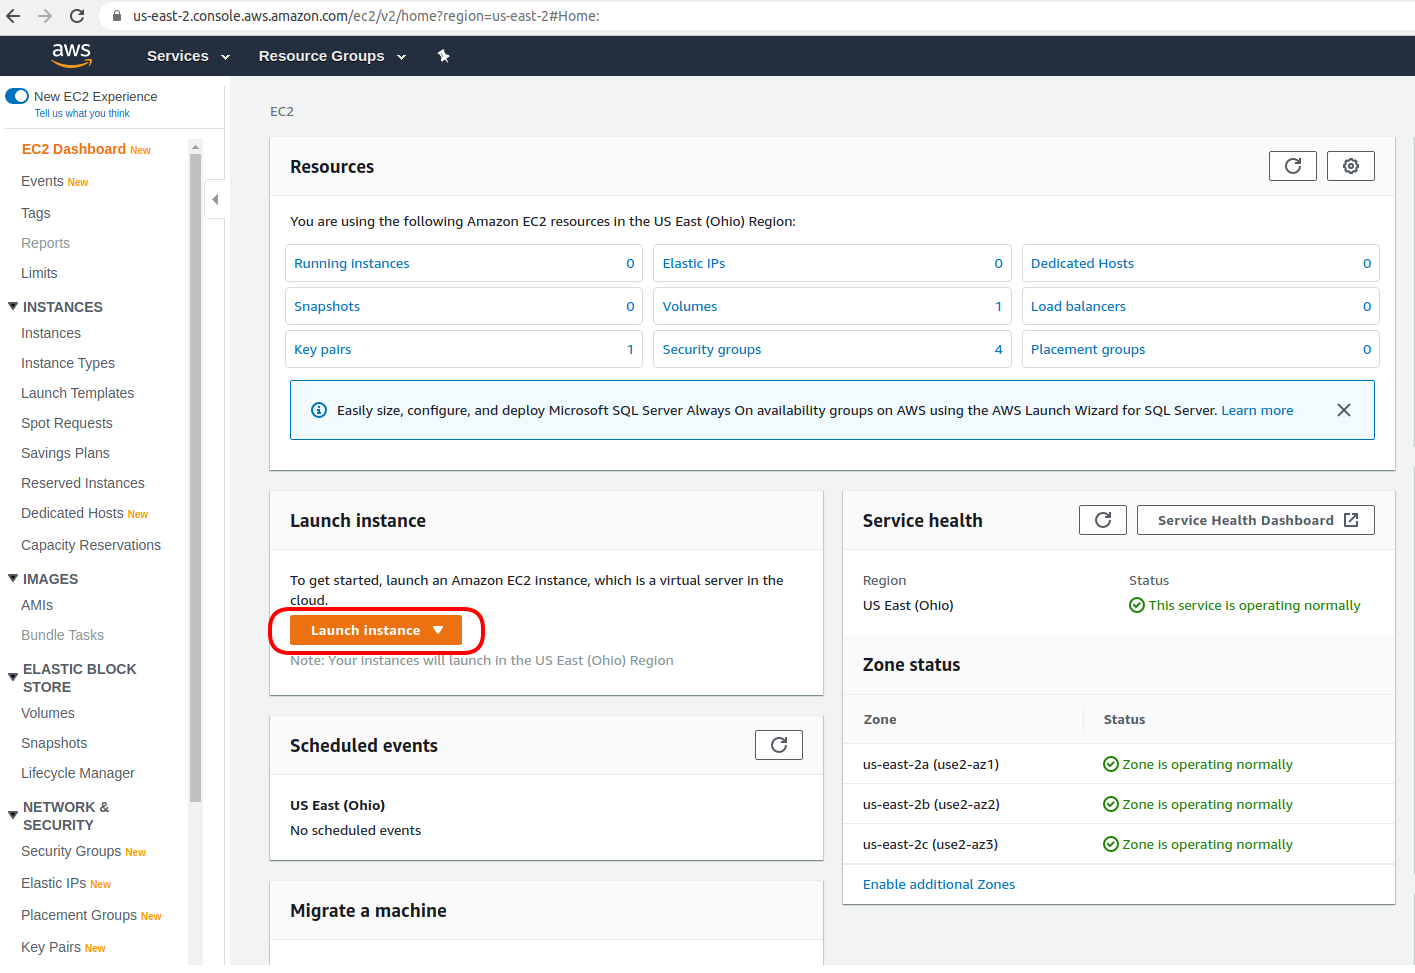
After we click EC2, we are redirected to the EC2 console. Let’s launch a
new EC2 instance!
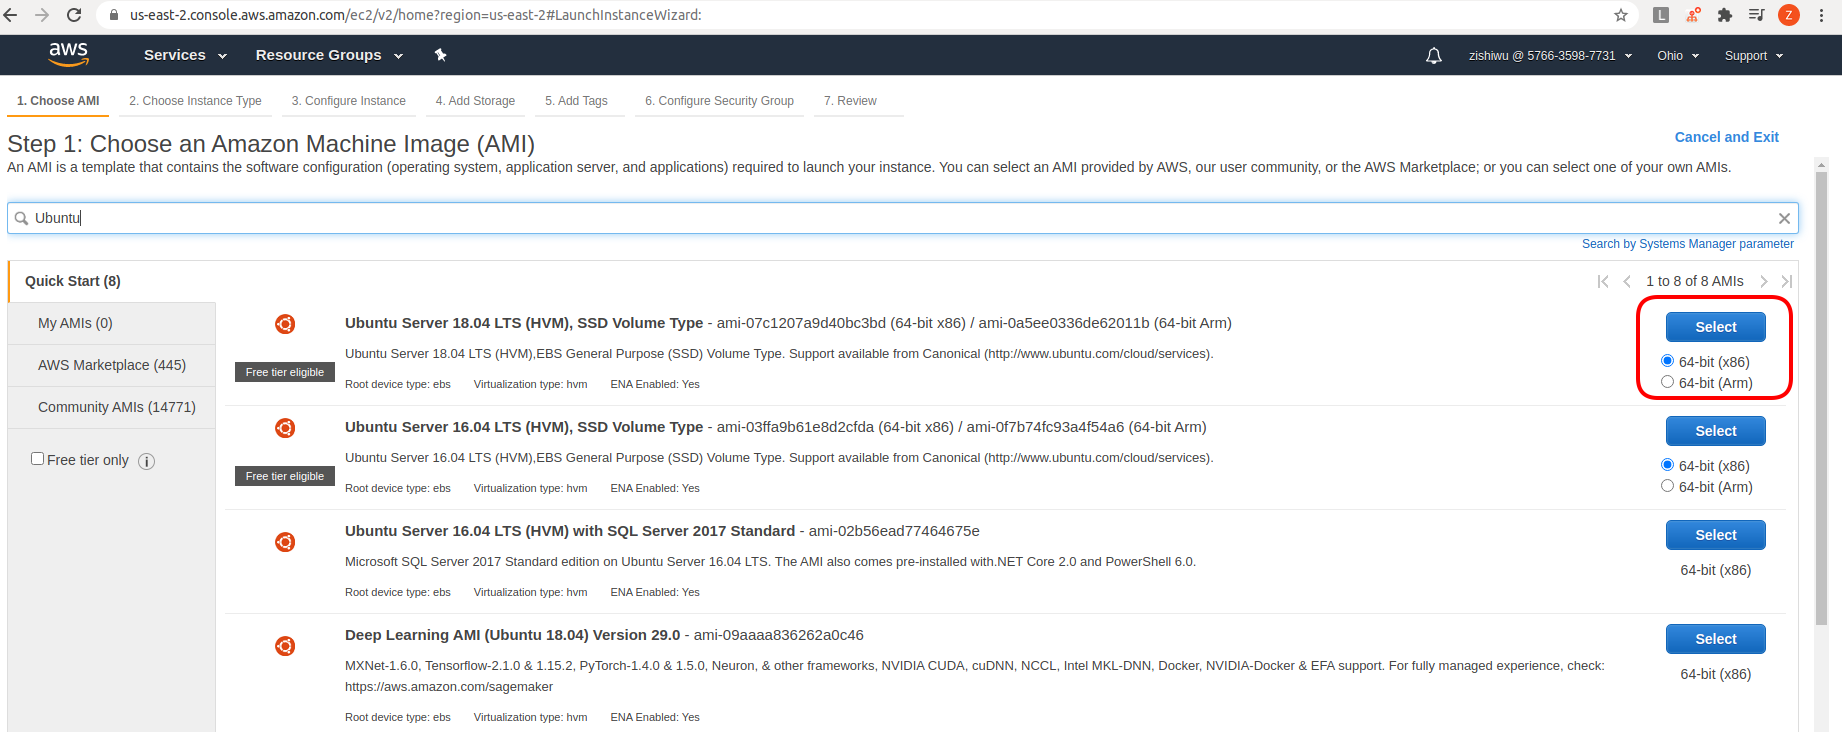
There are many Amazon Machine Images (AMIs) to choose from. Here,
I searched for Ubuntu and selected Ubuntu Server 18.04 LTS.
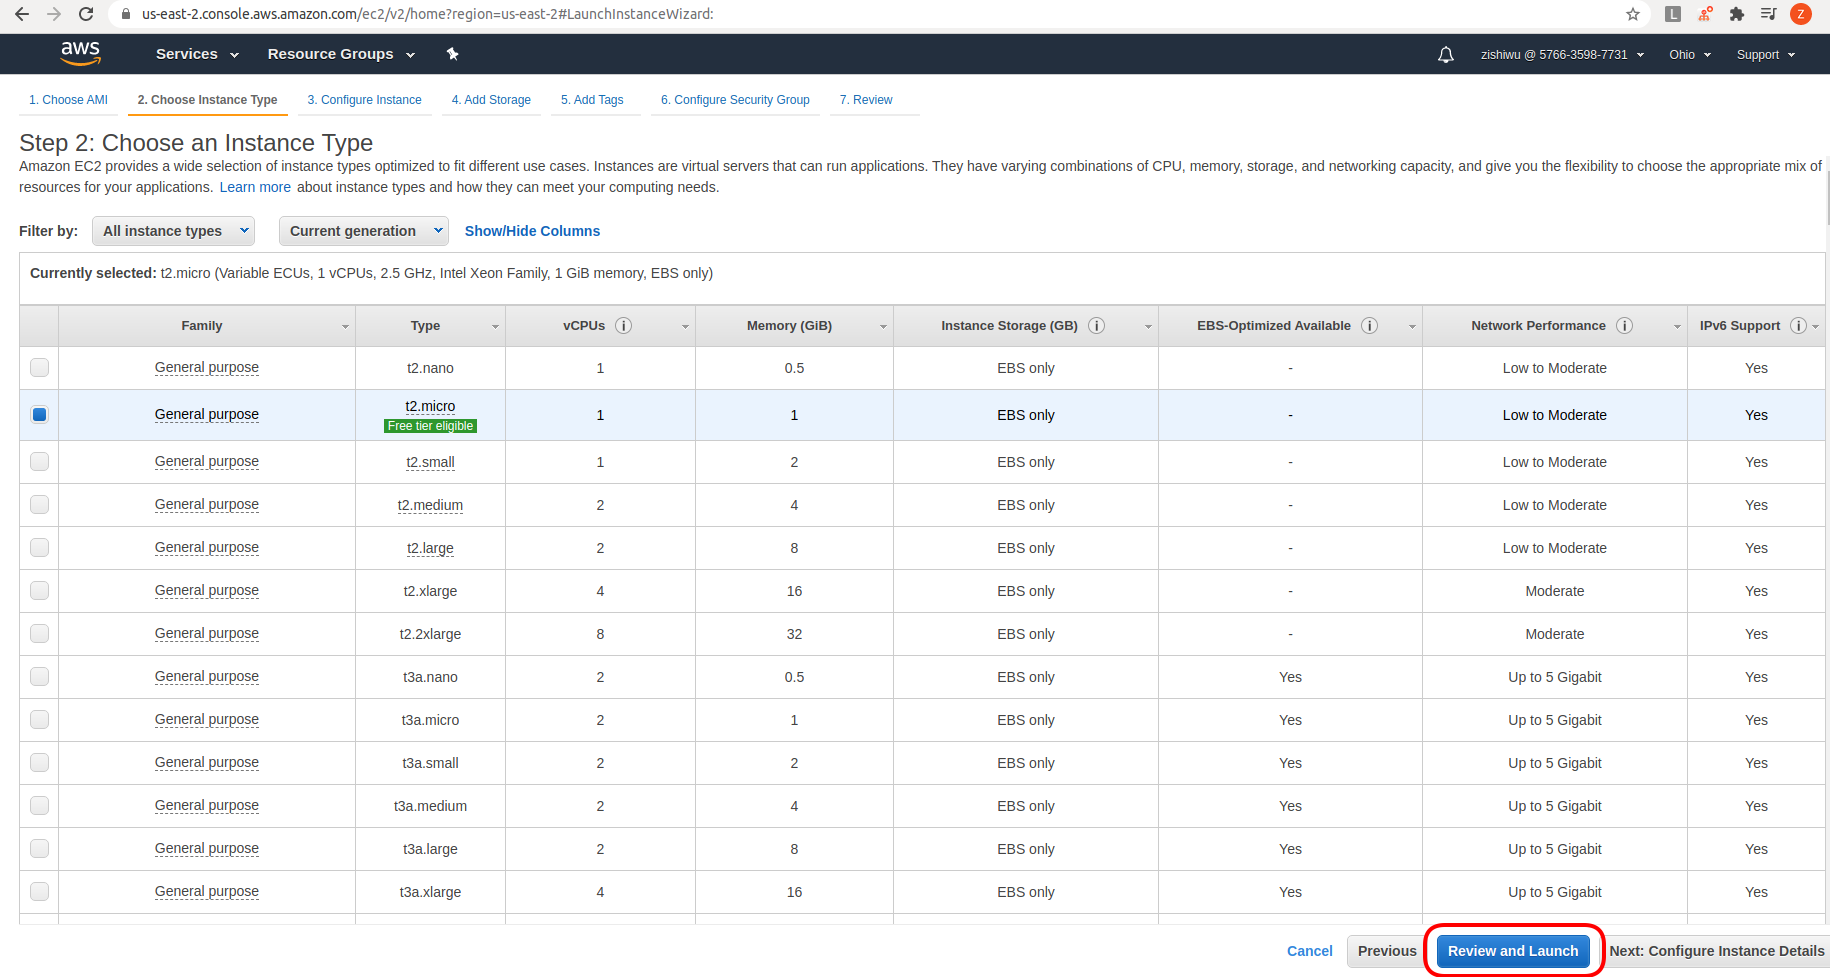
Next we need to choose an instance type. Here I just stick to the default
t2.micro instance because it is eligible for the AWS free tier. I am also
sticking to the default configuration details. Gradudate students like myself
can’t be picky about the type of cloud-hosting machine they use. Hopefully
when I become a data scientist, this will change.
Review to make sure we selected the image and machine that we wanted.
Now let’s launch our EC2 instance.

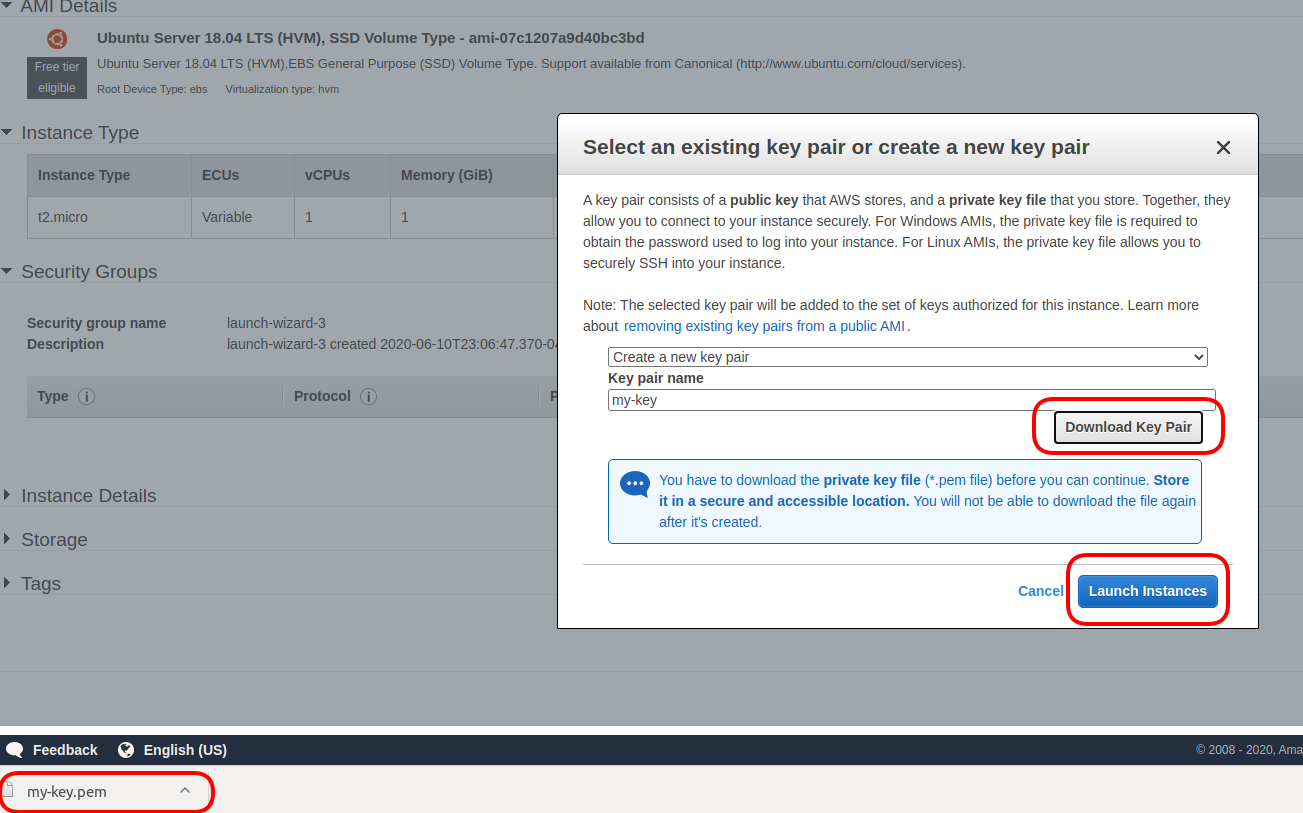
Before we can launch, we need to create a new key pair, or use an existing
one, for securely connecting to our machine via ssh. Here I will create a new
one called my-key. After clicking Download Key Pair, I get a
<my-key>.pem file. You can name your key pair file however you like.
Note: My computer is running on Ubuntu, but MacOS also has the ssh command for remotely connecting to the EC2 instance. In Windows, there are more steps involved before you can remotely connect to an AWS instance. I can make a guide for Windows in the future, but for now please read the AWS guide for Connecting to your Linux instance from Windows using PuTTy. This will require installing an SSH client called PuTTy.
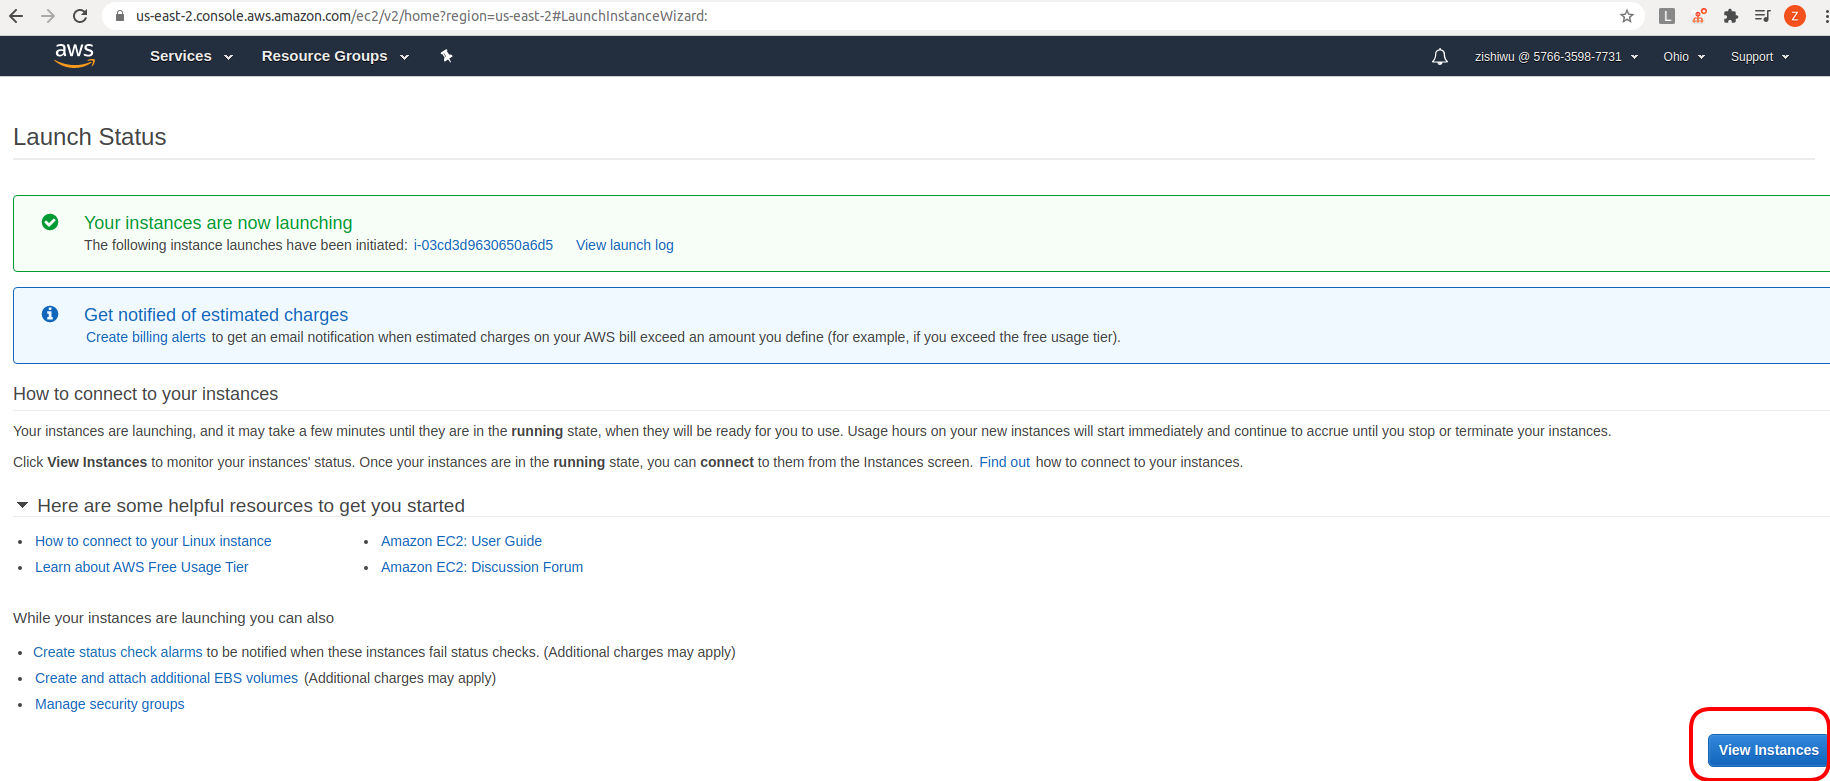
We have launched the EC2 instance! Now let’s check its status.
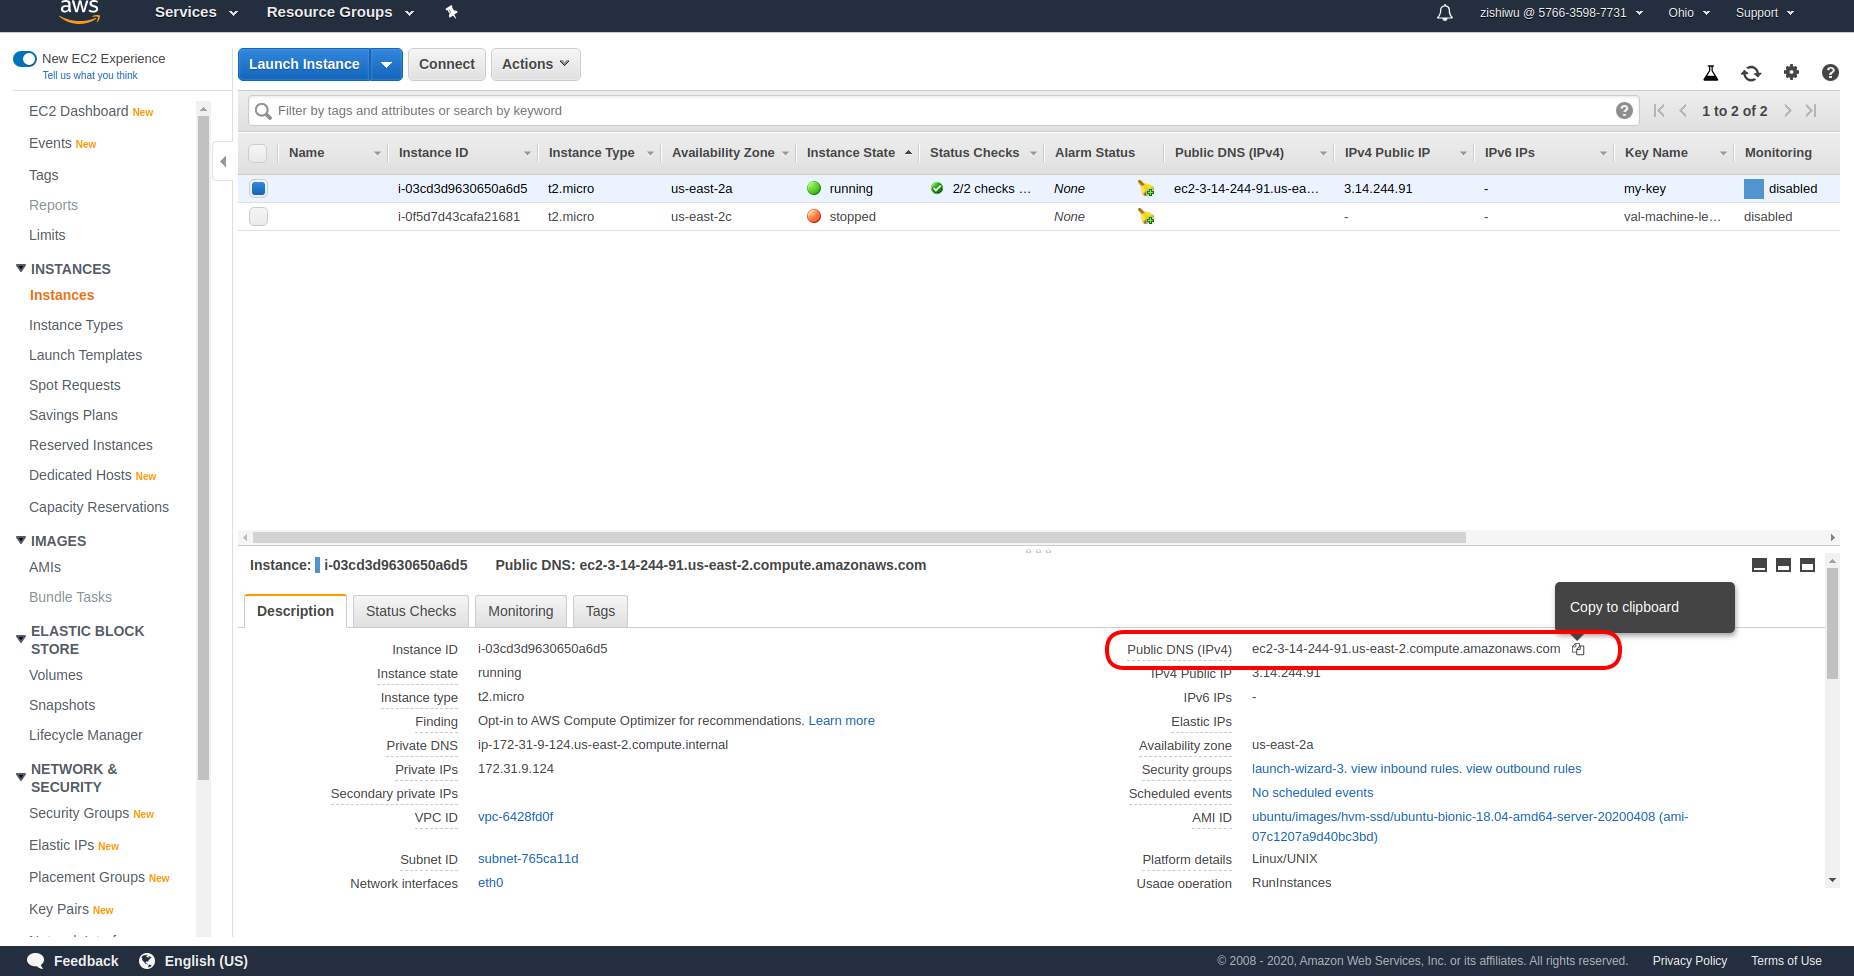
Here I have two EC2 instances but the one that is running is the one that
I just created. The other instance has been stopped to prevent charges from
accruing when we are not using it. Here we can find some important information
of our instance, such as its Public DNS or IPv4 address, which we will copy
in order to ssh into the instance.
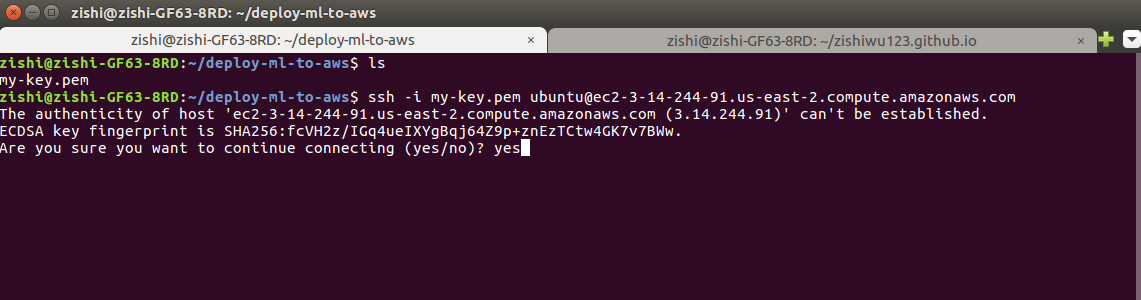
Now let’s ssh into our instance. I’ve created a directory called
~/deploy-ml-to-aws and moved my my-key.pem file from ~/Downloads
to this directory. You can call your .pem file and your working directory
whatever you want. We can ssh into our instance using the command format:
ssh -i <file_name.pem> ubuntu@<IPv4_address>.com
Here, ubuntu means we are logging in with user-level permissions instead of
root level permissions.
Oh no! We got a Permission denied (publickey) error while trying to ssh
into the instance. Time to use Google Search and Stackoverflow.
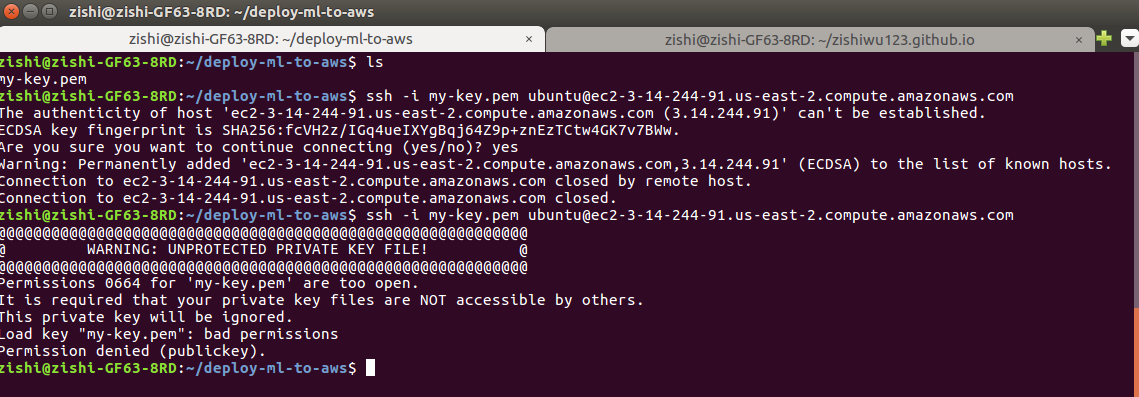
A quick Google Search of AWS pem file Permissions denied (publickey)
gets us the following article on Stackoverflow.
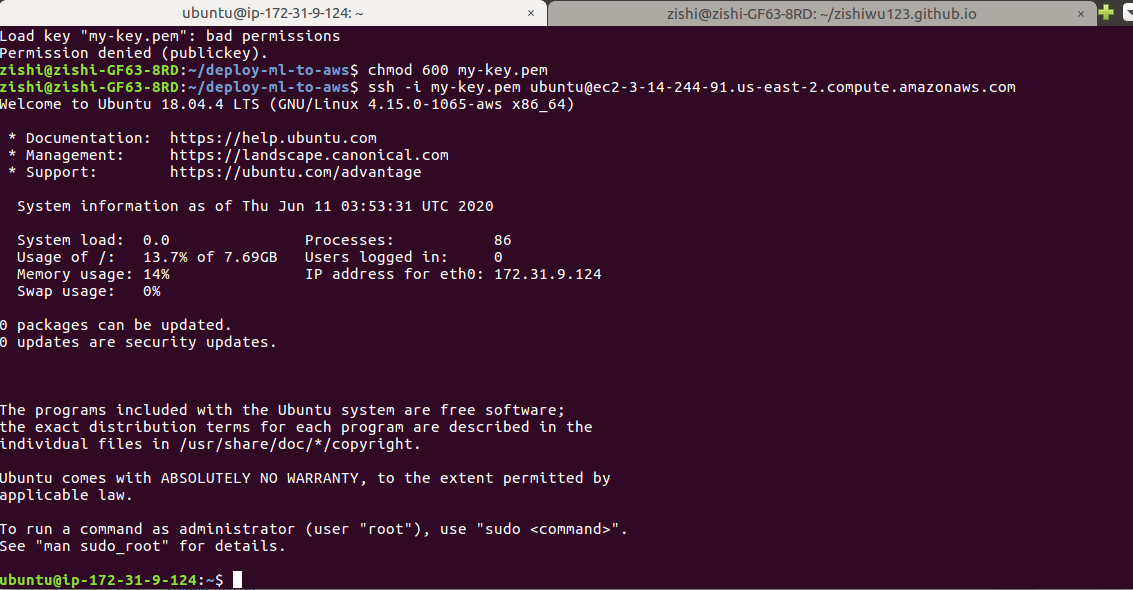
I modify the permissions of my-key.pem to 600, which means that only the
user/owner of the computer can read and write this to this .pem file, but
not execute it. Groups and others cannot do anything to the .pem file.
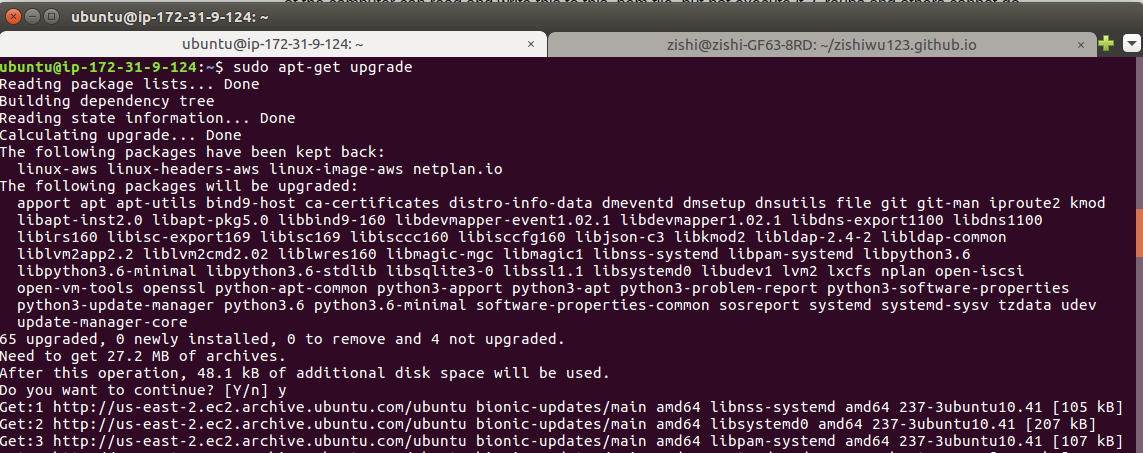
For an explanation of the difference between sudo apt-get update versus
sudo apt-get upgrade, check out this article on Stackoverflow.
We run the two commands in the order below to get system-level software that
Ubuntu 18.04 needs.
sudo apt-get update
sudo apt-get upgrade
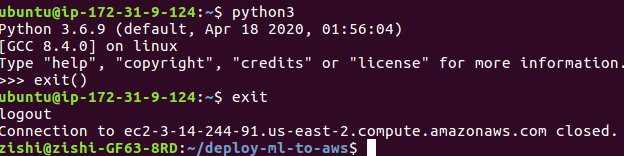
Once the EC2 instance running Ubuntu Server 18.04 LTS has finished
upgrading, we can check its Python version. Here, it has Python 3.6.9 as
the default Python. Note that if we were using Ubuntu 16.04 LTS, the
default python would be version 2.7.12. I am writing this as of
June 2020. The default versions of Python may change in the future.
Once we have confirmed a default version Python 3.6 or later, we can exit.
This concludes the first tutorial on the series. We have successfully created
an EC2 instance with a Ubuntu Server 18.04 LTS image. Next time we will
create a Git repository and clone it to AWS.